
Year 2, Week 10 – Gorge Walks, Free Camps & New Horizons
Monday morning, we hit the road in the direction of Carnarvon Gorge — about 470km from Gladstone. The plan was to find a roadside stop roughly halfway for the night, but that turned out to be easier said than done! Most of the gravel pit roadside stops were really overgrown and sitting right on the edge of the road. We’re not usually picky with our camps, but none of these felt right.
So, we ended up pushing on all the way to Rolleston and scored an unpowered site at the local caravan park. After a good night’s rest, we were up early the next day and back on the road. The drive from Rolleston was slow going — the roads out this way aren’t exactly smooth, with big dips and mounds in the bitumen. Luckily, we tucked in behind a truck driver who clearly knew the road like the back of his hand, following his every move around the rough spots. We were genuinely sad when he turned off onto another road — we were left to fend for ourselves!
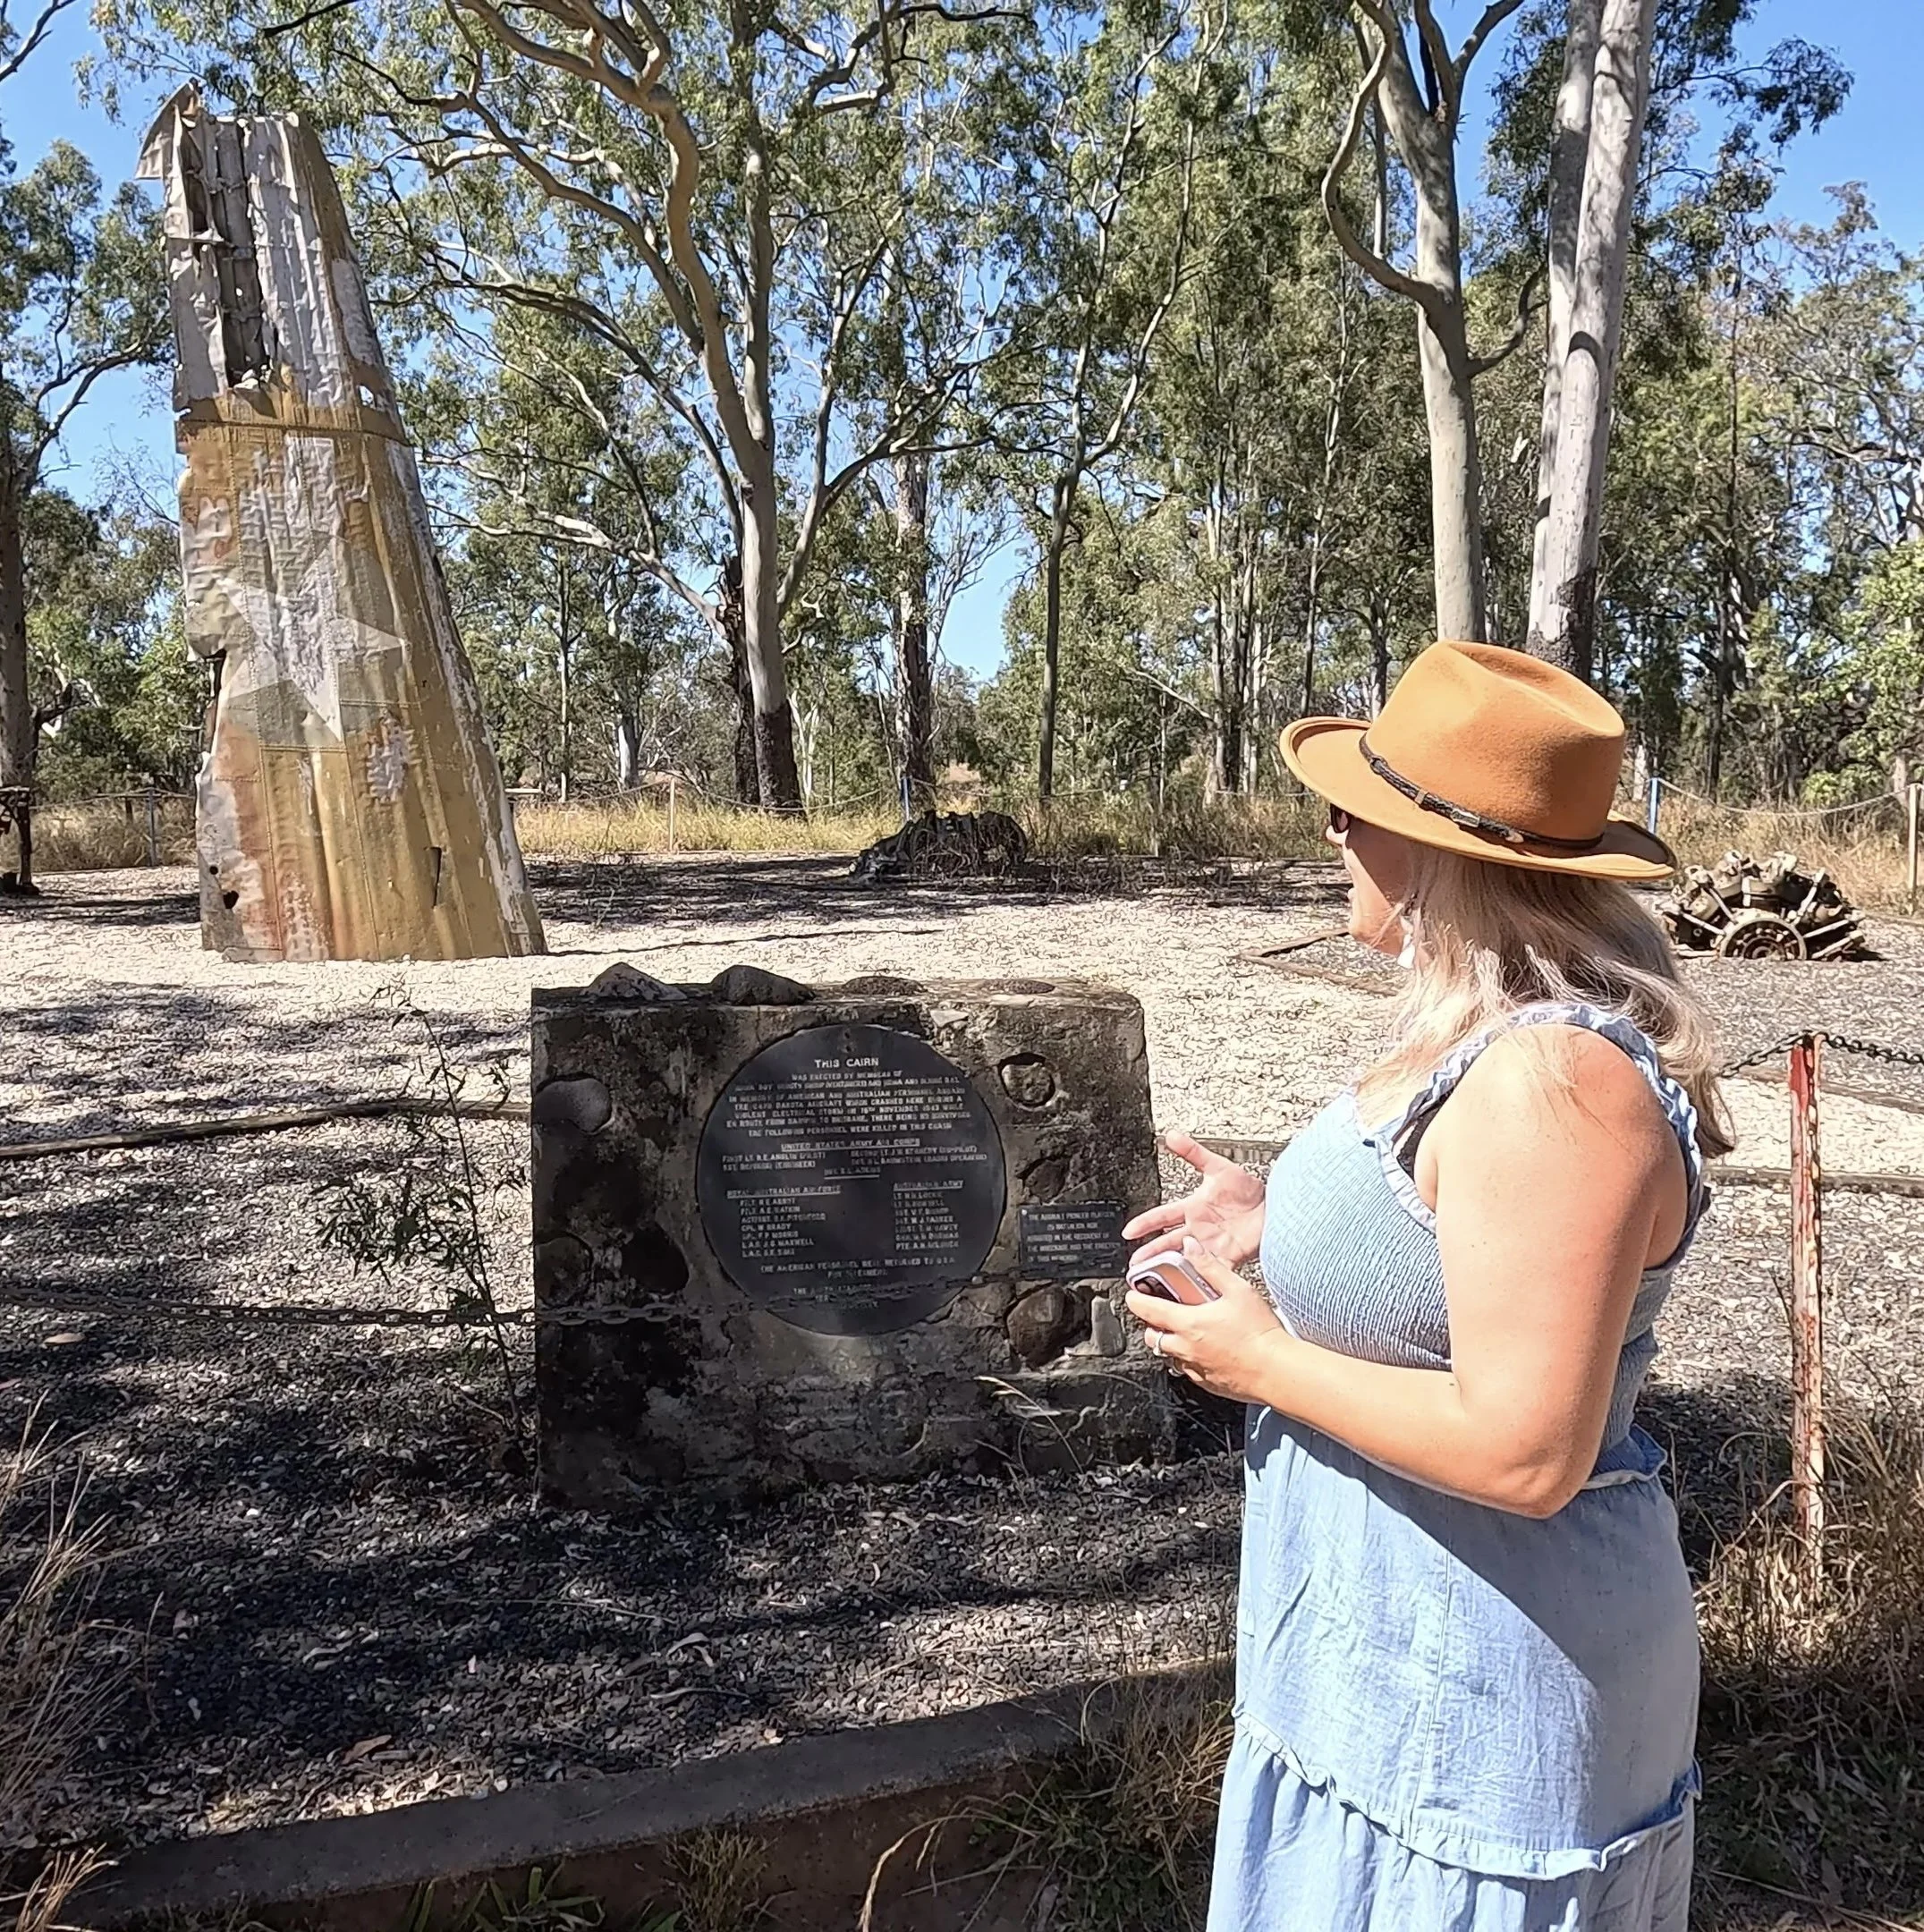
Along the way, we stopped at the Dakota Crash Memorial, a site dedicated to the 1943 crash of a USAAF C-47 Dakota during WWII. All servicemen on board lost their lives, and today, the memorial honours their sacrifice. This one hit home for Rachael, who grew up in the UK and spent many weekends watching the Dakota fly overhead — a quiet, reflective stop.
We rolled on, dodging wandering cows on the road, and finally wound our way down into Carnarvon Gorge. Crossing the little river to get into the BIG4 Breeze Holiday Park felt like the real start of the adventure. Just a heads-up if you’re heading out this way — heavy rainfall can make this crossing tricky, so plan ahead!
We set up on our unpowered site (very shady — not great for solar, which quickly became Ryan’s biggest worry for the next few days) and settled into the park. Rachael got some work done while we prepped for the big hike the next day. Each night at 5pm, the park shows an informative video about the gorge and its hikes — conveniently located at the bar! Highly recommend grabbing a drink and checking it out.
If you’re planning to visit Carnarvon Gorge, book your site ahead of time! There are two main camping options — Sandstone Park, which has incredible views but is fully unpowered and no water, and BIG4 Breeze, which offers powered/unpowered sites, water, and hot showers (a big win after a day’s hiking!). We picked BIG4 for the creature comforts, and we’re glad we did. Even booking just a few days out, we snagged one of the last two unpowered sites — and this wasn’t even during school holidays!
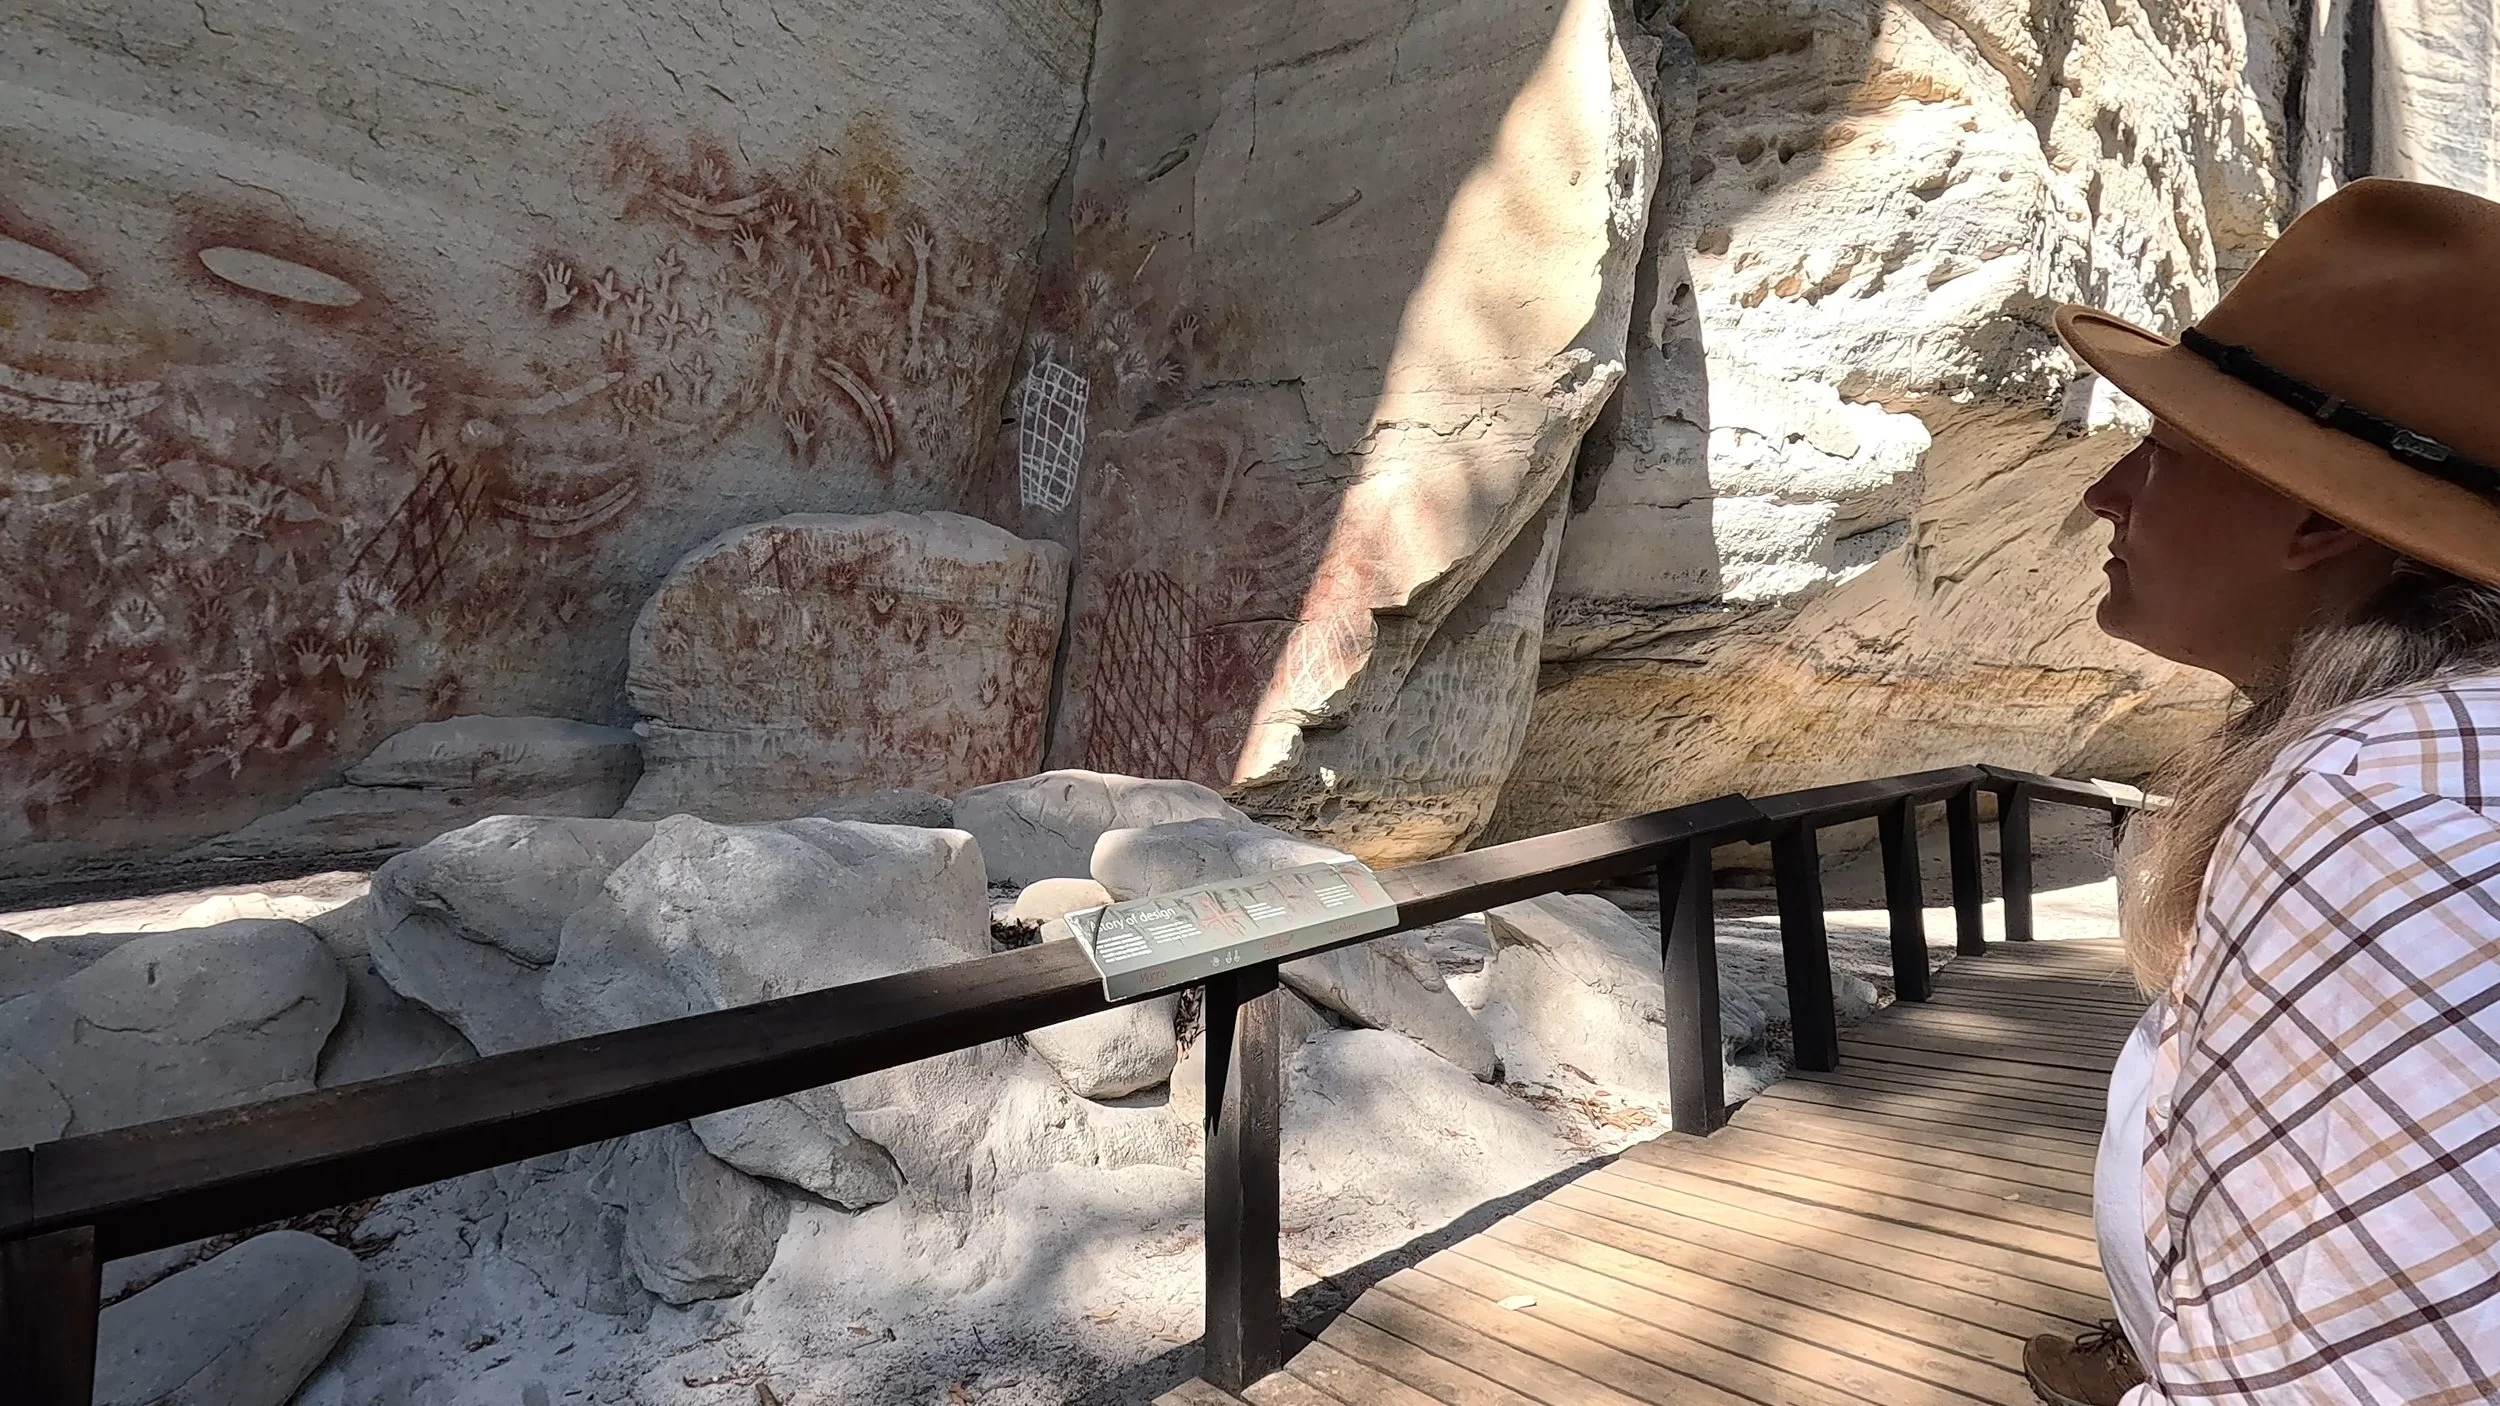
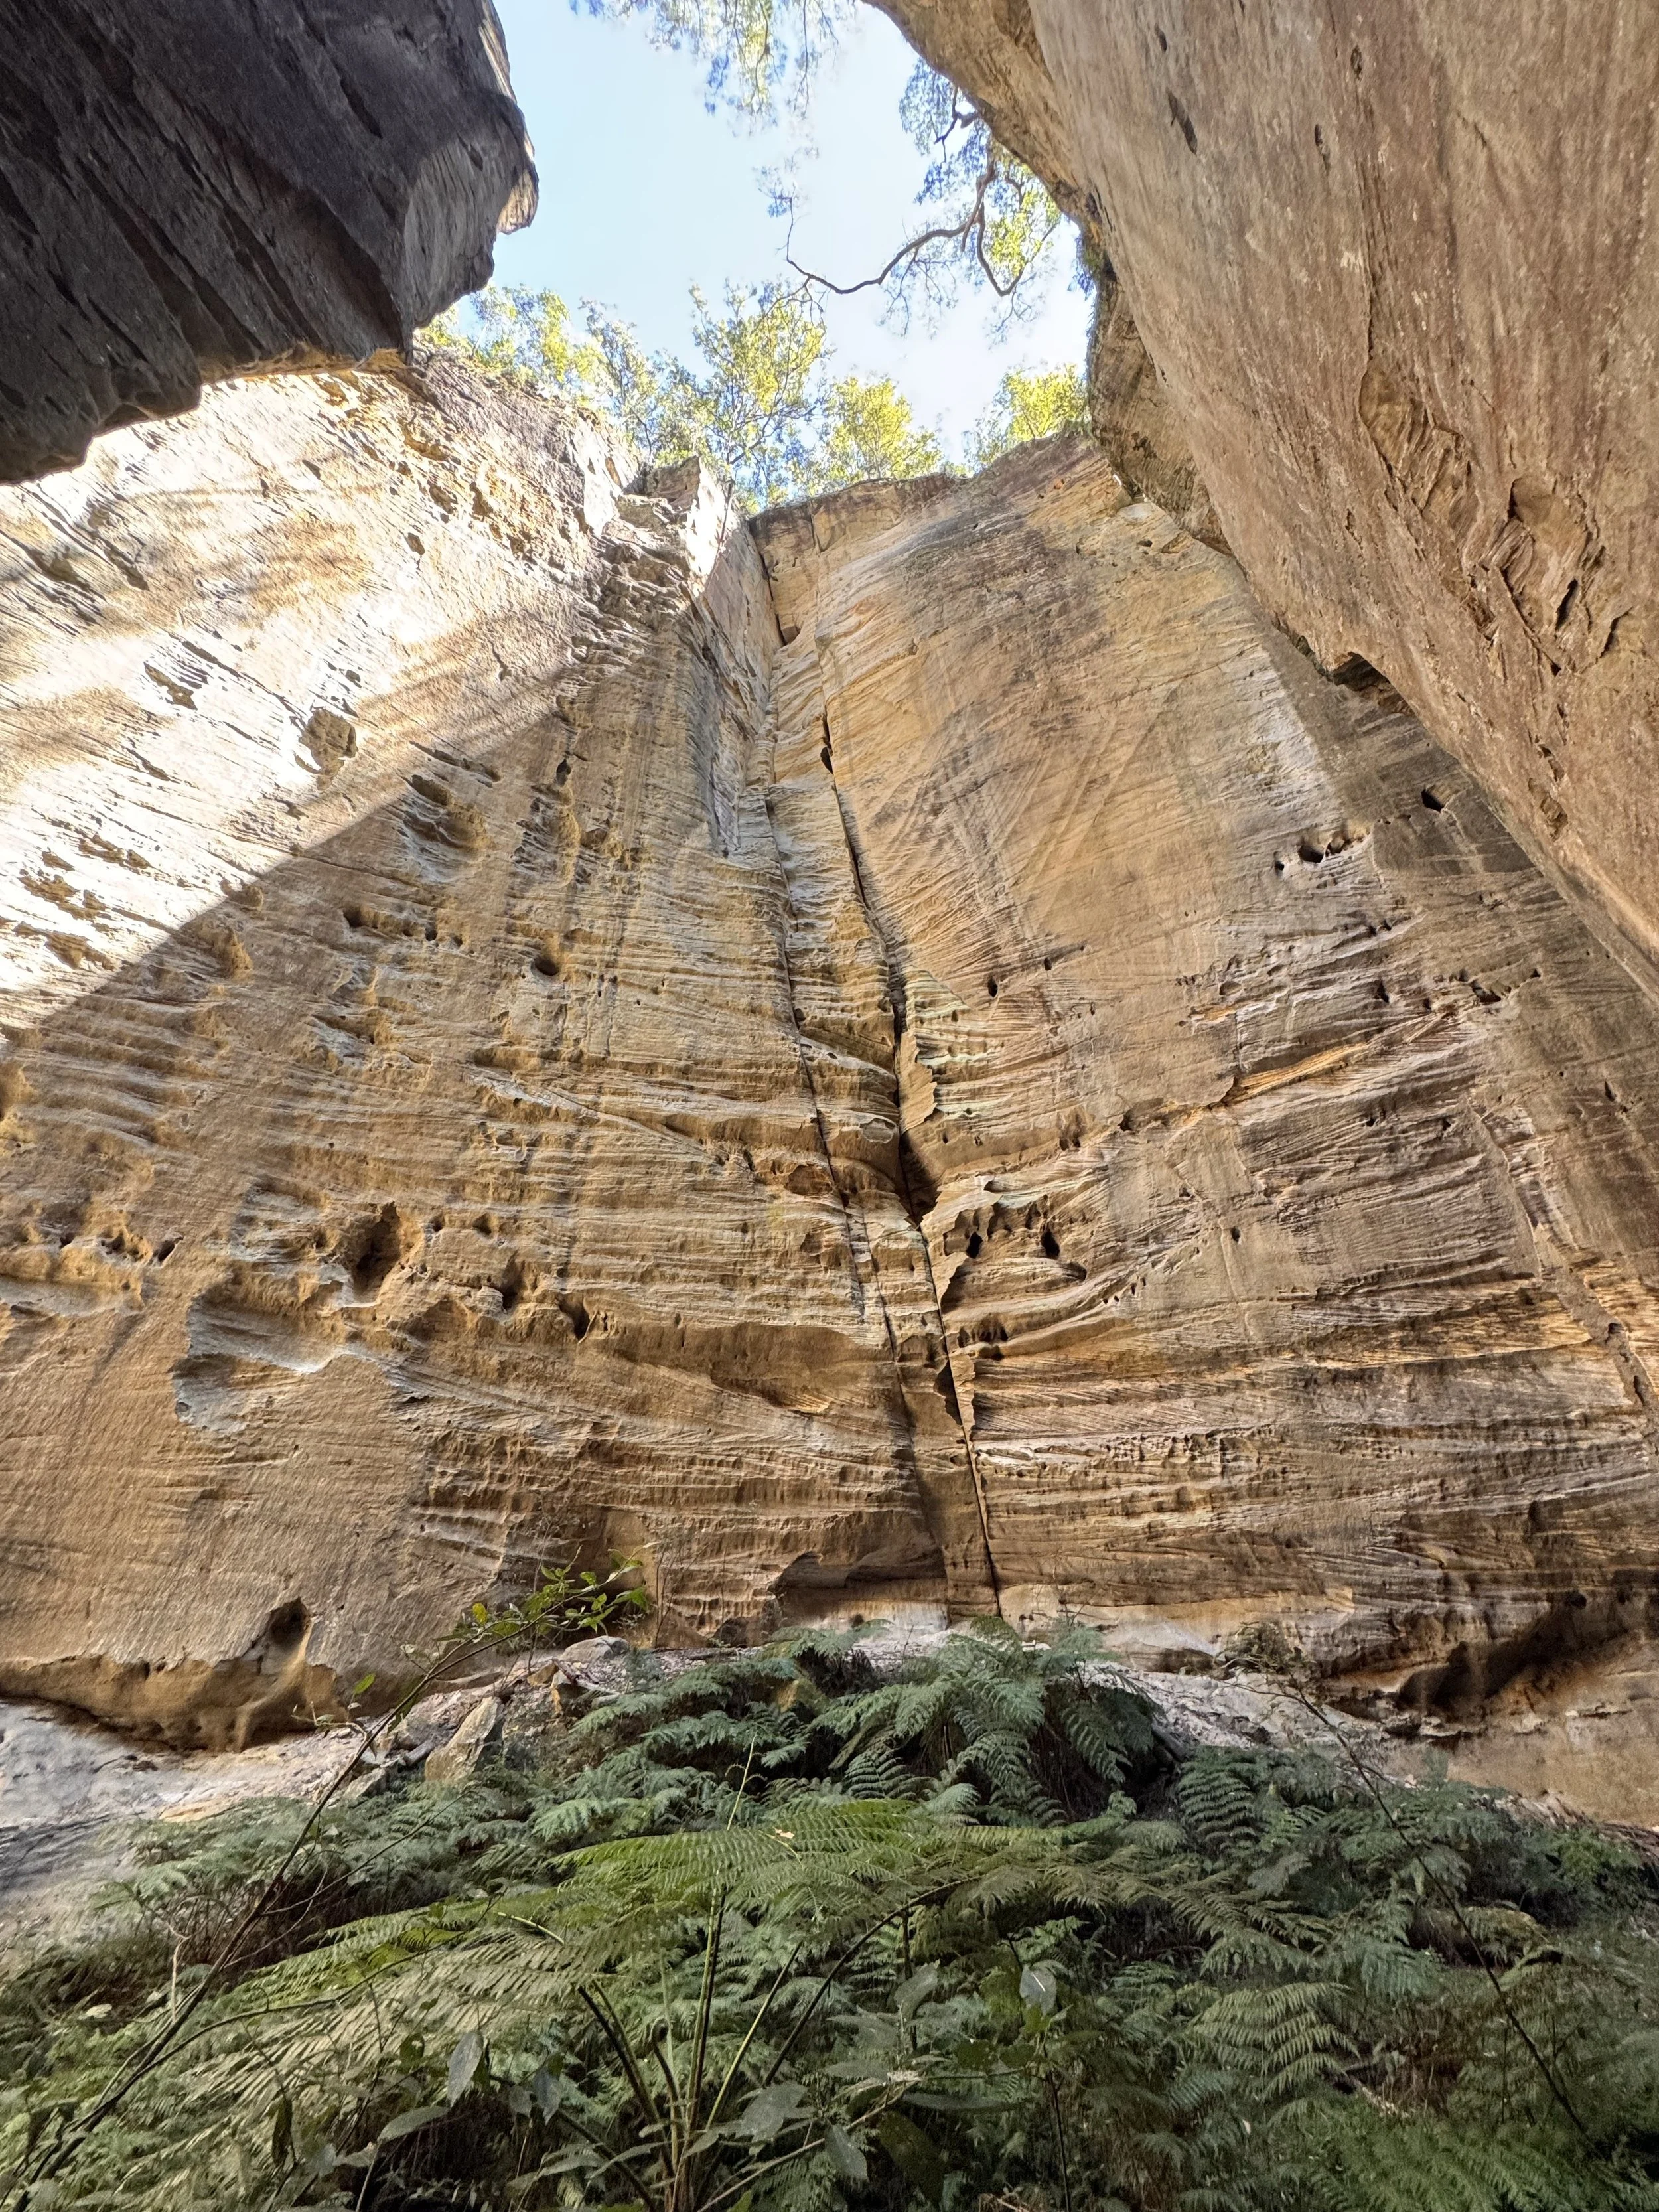
The next morning, we were up bright and early, packed lunch, filled our water bottles, had brekky, and headed to the visitor centre where the main Gorge Walk begins. The full walk is around 19.4km return, but our goal was to make it to the Art Gallery, which sits about 5.4km from the trailhead. At the start, Rachael mentioned needing a walking stick — Ryan laughed and pointed out the pile of about 20 perfectly picked sticks sitting at the trailhead, ready for hikers. Nice little touch! Stick in hand, we set off, crossing the first creek and powering through to the Art Gallery, saving the other sites for the return walk.
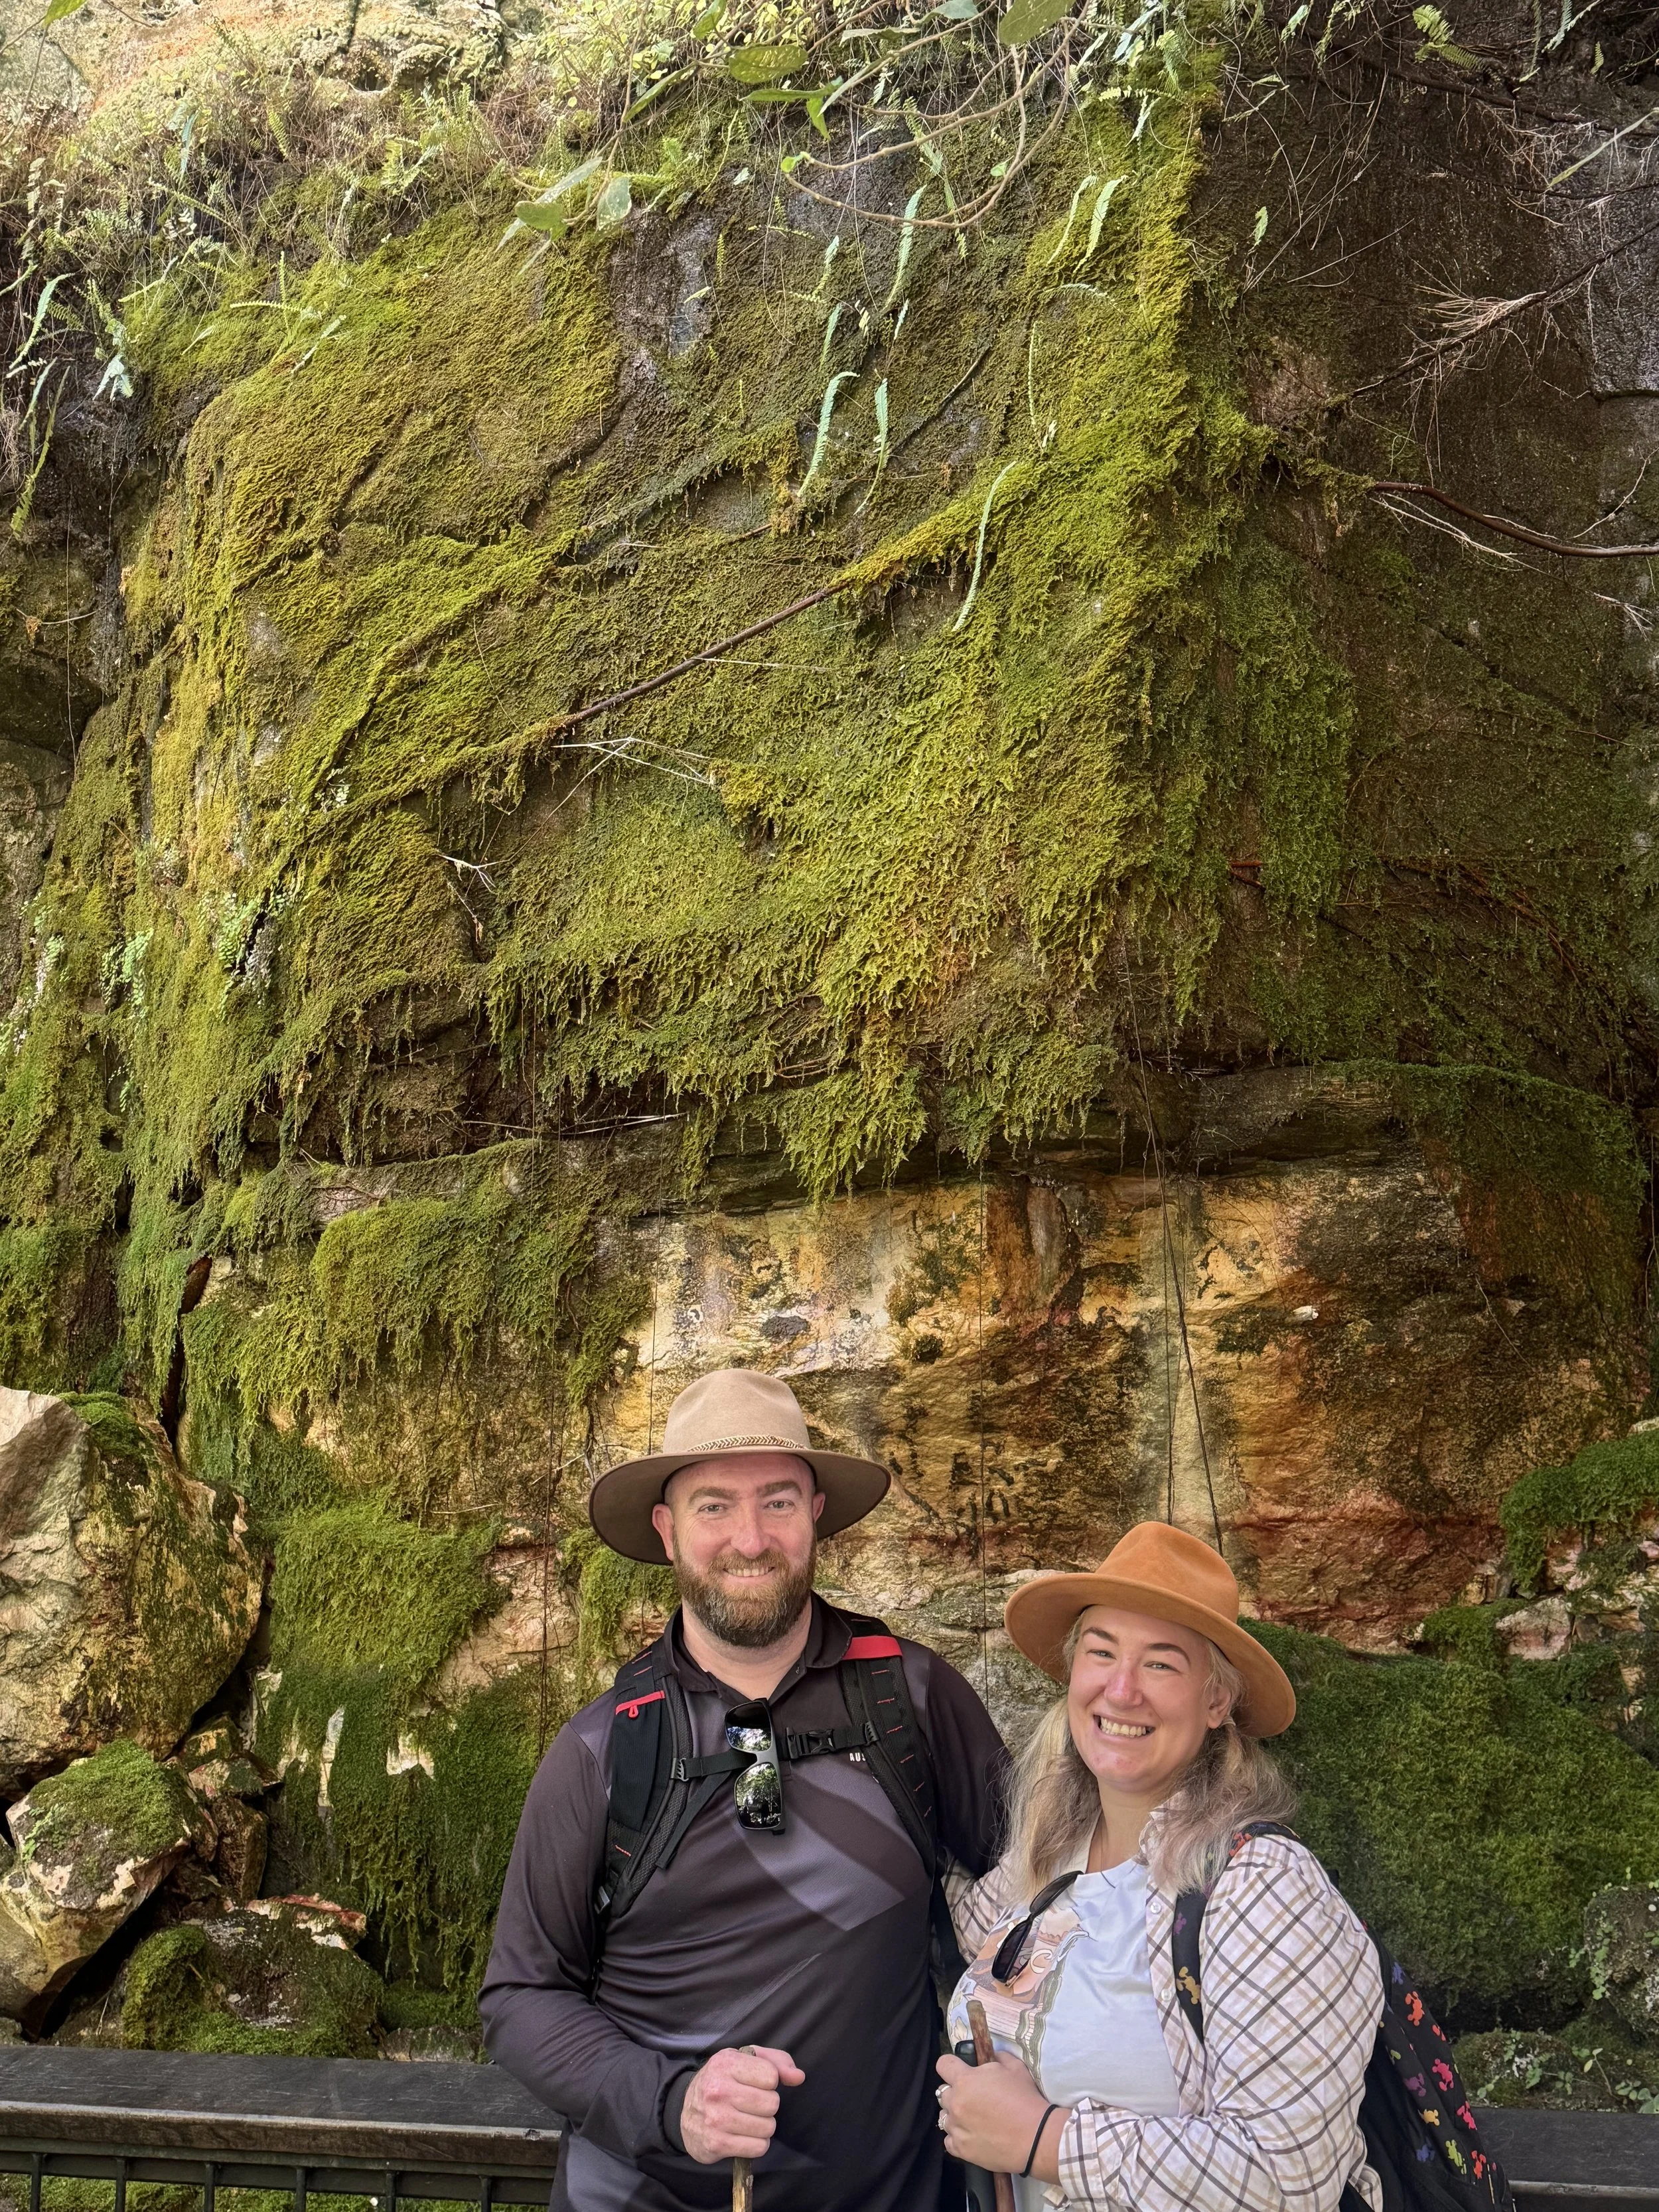
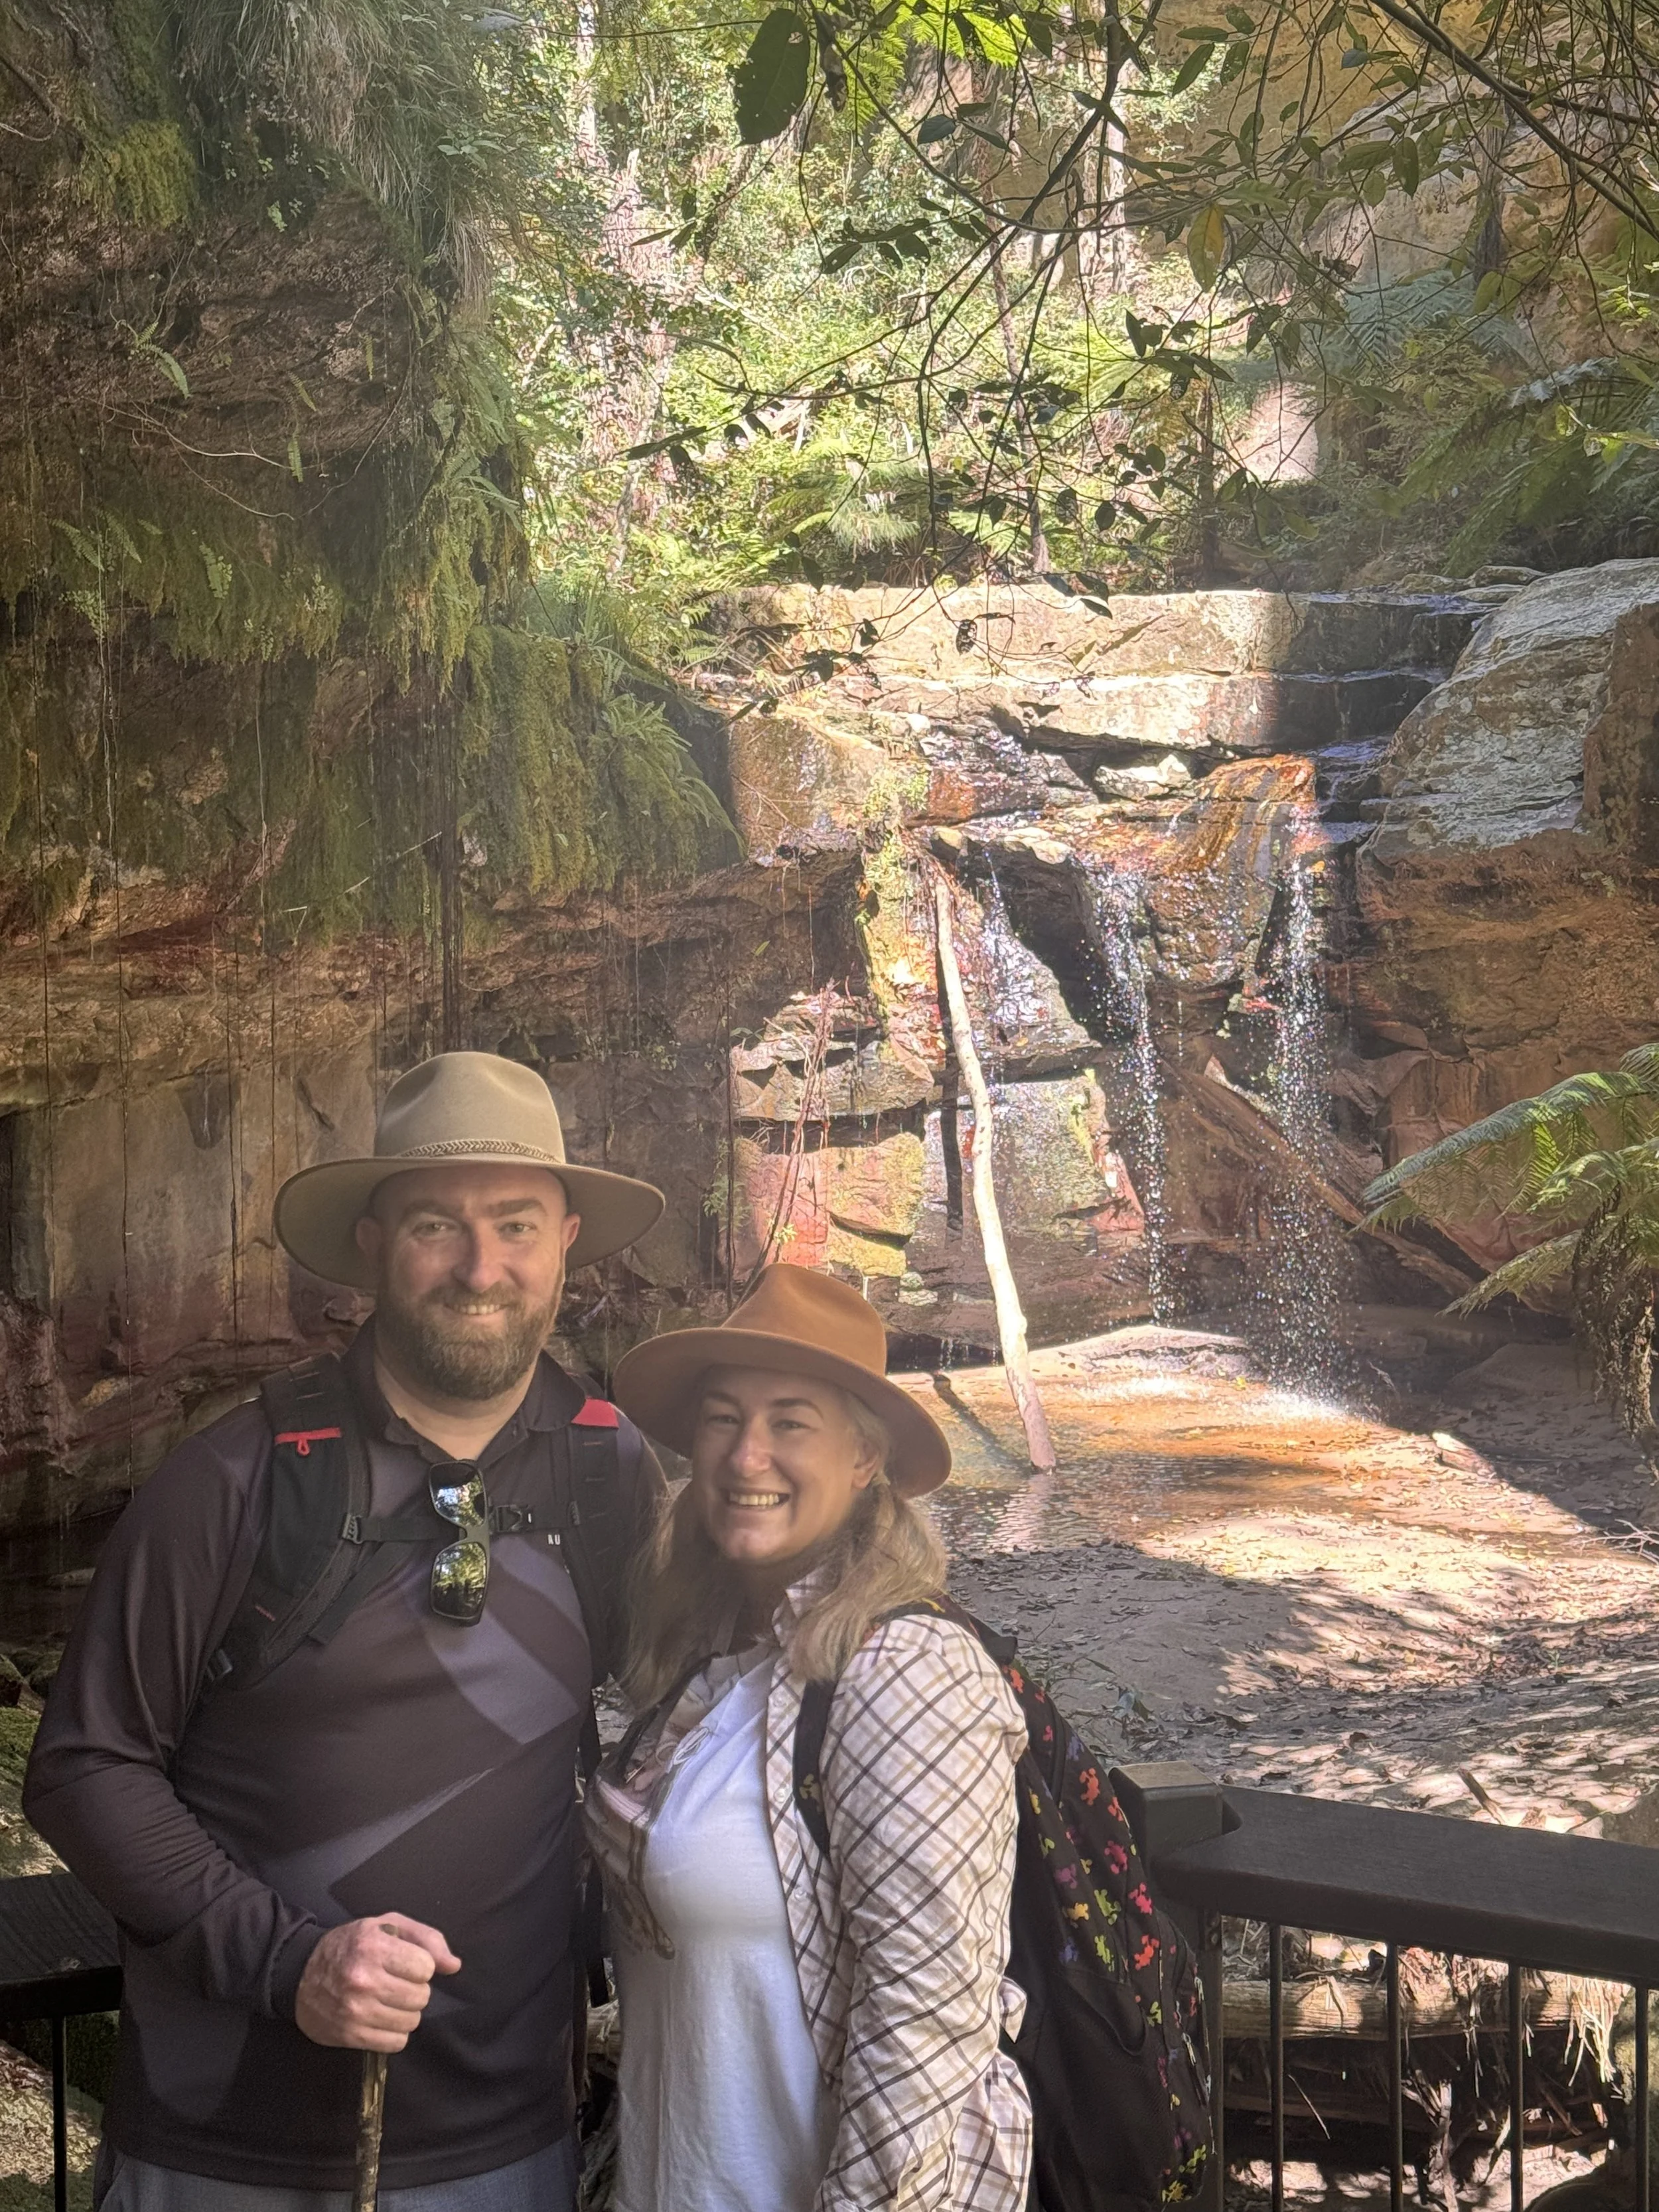
The Art Gallery was absolutely worth it. The rock art is believed to date back over 3,500 years — an incredible glimpse into ancient Indigenous culture. We sat for a while, just soaking it all in. On the way back, we detoured to check out the Amphitheatre and Moss Garden — both must-see spots if you’re visiting.
All up, we walked just over 12km and felt surprisingly good the next day. It’s one of the smoother, well-maintained trails we’ve tackled on this lap, and we can’t recommend it enough!
The following day was a bit slower — Rachael caught up on work while Ryan relaxed, and later we wandered down to the Rock Pool for a refreshing (and freezing!) swim.
After leaving Carnarvon Gorge, we headed north and stopped at a gorgeous little free camp called Virgin Rock Rest Area, just outside Springsure. What a hidden gem! Stunning views, a relaxed vibe, and plenty of space — but it’s a popular one, so get there early.
From there, we pushed on to Theresa Creek Dam. Everyone raves about this spot, and we could see why — but unfortunately, the wind was relentless during our visit. We spent most of our time tucked away in the van but managed to sneak out for a fire in the evening once the breeze settled (why does the wind always disappear at sunset?!). For $20 a night unpowered, with toilets and showers, it’s a cracking stop and one we’d happily come back to in better weather.
Finally, we rolled into Moranbah, our next home base for a little work stint. Known as one of Queensland’s larger coal-mining towns, Moranbah is small but buzzing with activity. It’s a handy spot to restock, reset, and prep for the next leg of the adventure.
Hit the road 🎵 — we’ve got places to be. – R&R